
PLATFORM WORKFLOW
Task Description: Add, Edit, and Remove a User
Objective: To show Organization Admins and Users how to manage user access within their organization
Organization: Under Admin or System User
System Permission Level: System Admin/User and Organization Admin
Step 1
Go to www.growthpowersuite.com and click the green Login button.

Step 2
Enter your username and password then click the blue Login button.

Step 3
Click on your Organization (if you are in multiple organizations). If you are only in one, you will begin on the Dashboard.

Step 4
Click on the Settings tab in the Module Menu Panel.

Step 5
Then, click on the User Management tab at the top of the Settings menu.
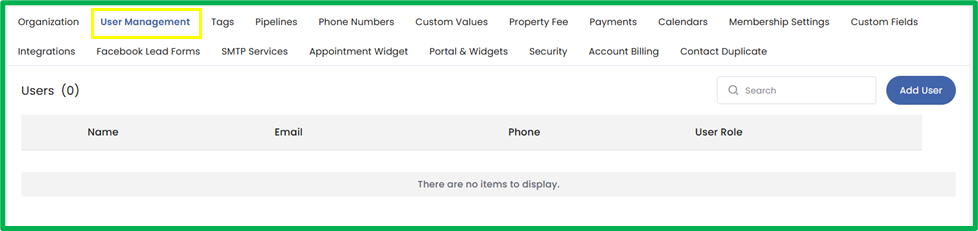
Step 6
Click the blue Add User button on the top right corner of the page.

Step 7
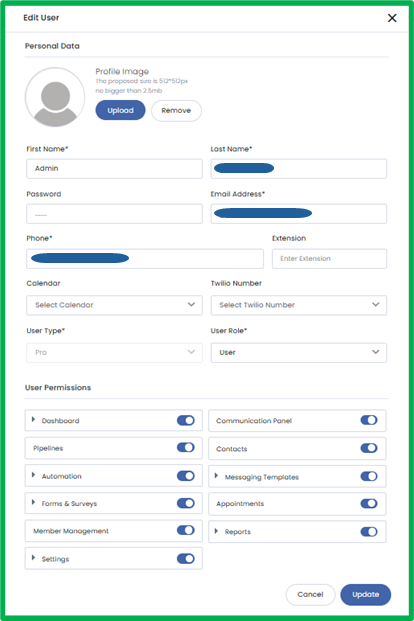
A popup will materialize prompting you to enter the new user’s information. There are two sections in this popup: Personal Data and User Permissions.
Personal Data Section
- Profile Image: Upload a profile picture for the user or remove an existing one.
- First Name: Enter the user’s first name.
- Last Name: Enter the user’s last name.
- Password: Create the user’s initial password. This will be the temporary password. After signing in, the user can update their password at any time.
- Email Address: Enter the user’s primary email address.
- Phone: Enter the user’s phone number.
- Extension: Add an internal extension number if applicable.
- User Type: This field is prefilled based on your organization’s configuration and cannot be changed.
- User Role: Select whether the user should have an Admin role or a User role. Admins have elevated access within the organization.

User Permissions Section
In this section, you can grant or restrict the user’s access to specific modules.
- Each module has a toggle that allows you to enable or disable access.
- Some modules include an accordion icon (a right-pointing arrow). Clicking the arrow will expand additional permission options, allowing you to set more detailed access controls for that module. This enables more precise permission settings when needed.

Step 8
Once the configuration is completed, click the blue Save button to add the user to your organization.

Step 9
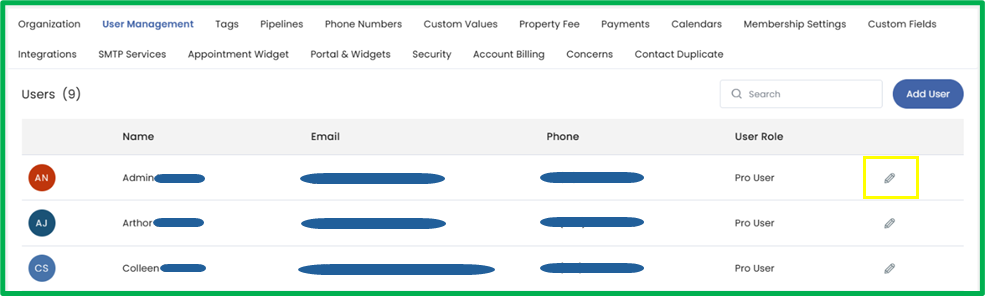
To edit a user, locate the user you want to edit by scrolling or using the search bar.

Step 10
Click the pencil icon on the far right of the user’s name.
Step 11
An Edit User popup will appear where you can update all relevant user details. In addition to the fields shown during user creation, two additional fields will be available:
- Calendar: Use the dropdown menu to assign a calendar to this user. Linking a calendar allows the user to manage appointments, scheduling, or any calendar-related activity associated with that specific calendar within your organization.
- Twilio Number: Use the dropdown menu to assign a Twilio phone number to the user. This links the selected Twilio number to the user for outbound and inbound SMS and calling functions.
You may update any of the displayed fields as needed to ensure the user’s information and access are accurate.
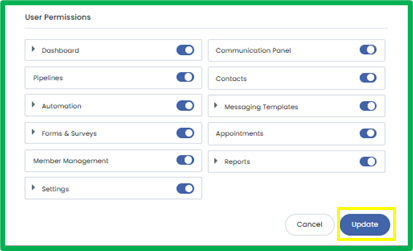
Step 12
Once user’s details are updated, click the Update button to finalize the edits.
Step 13
To remove a user, locate the user and click the red trash can icon.

Step 14
A confirmation popup will appear. Type Delete in the textbox and click Submit to confirm the removal of the user.
