
PLATFORM WORKFLOW
Task Description: Create, Edit, and Delete a Form/Survey
Objective: To show Organization Admins permission level and Users how to build a form/survey
Organization: All
System Permission Level: System Admin/User and Organization Admin/User
Step 1
Go to www.growthpowersuite.com and click the green Login button.

Step 2
Enter your username and password then click the blue Login button.

Step 3
Click on your Organization (if you are in multiple organizations). If you are only in one, you will begin on the Dashboard.

Step 4
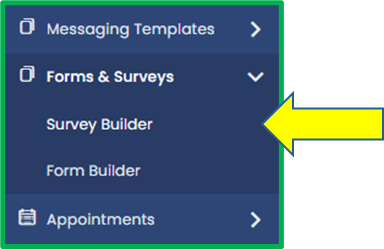
Click on the Forms & Surveys tab on the Module Menu Panel then click on the sub-tab Survey Builder or Form Builder. We’ll be creating a survey for this example, but the steps are the same if you're building a form so feel free to follow along.
Before we continue, it’s helpful to understand how forms and surveys handle collected data. In a form, the information submitted will flow into the contact’s corresponding primary, business, or custom fields. In a survey, the data does not populate any fields. Instead, it’s stored as a viewable record under the Activity tab within the contact’s details page.
Step 5
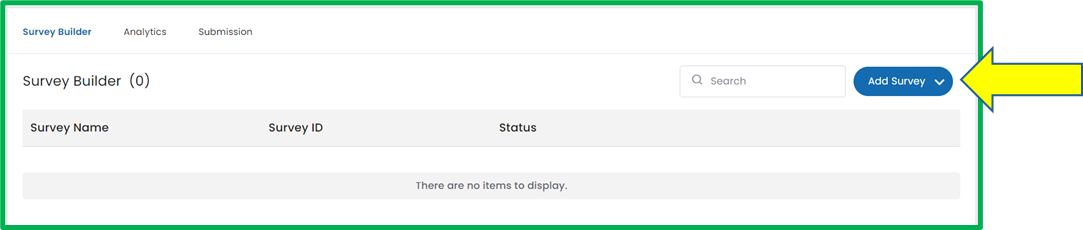
On the Survey Builder screen, click the blue Add Survey button and select Standard Survey from the dropdown.
For forms, there is no dropdown. Simply click the Add New Form button.
NOTE: If your organization has additional survey options in the dropdown, select the one that best fits your needs.
Step 6
Next, you’ll be taken to the Survey Builder screen, where you can start customizing your survey. In the next few steps, we’ll walk through the key features to help you get familiar with the builder.

Step 7
We’ll start on the left side. This is where you’ll find most of the tools and options you'll use to build your survey. The left panel includes three tabs: Fields, Styling, and Other.
- The Fields tab contains all the question types and input fields you can add to your survey.
- The Styling tab lets you customize the appearance of your survey.
- The Other tab includes additional features and actions you can add.

Step 8
Let’s begin with the Fields tab. You can add any field from this tab to your survey by dragging and dropping it into the blank area on the right.
To view different types of fields, use the dropdown menu at the top of the tab. By default, it shows Standard, but you can switch between Standard, Custom, and Quick Add fields from here.
Here’s a quick overview of the three field types:
- Standard Fields: These are common, pre-built fields like name, email, and phone number. They’re ready to use and are tied to a contact in the system.
- Custom Fields: These are fields you've created specifically for your organization. Use them when you need to collect information that isn’t covered by the standard options. You can create a new custom field by clicking the Add Custom Fields button at the bottom of the tab or in the Settings module. If you need help, check out the Create a Custom Field workflow for step-by-step guidance.
- Quick Add Fields: This section shows your starred fields for easy access. When you click the star next to a standard or custom field, it will appear here in a folder based on its type.

Step 9
Next, let’s move to the Styling tab. Here, you can customize the look and feel of your survey.
In this tab, you’ll see five folders:
- Page Layout: Controls the space around the form and overall layout. Here, you can switch between one or two columns, adjust spacing, and choose whether field labels should be visible.
- Form Style: Customize the appearance of the form itself, including background color, borders, and shadows.
- Field Styles: Adjust the styling for all fields, such as fonts, label colors, border style and placeholder style. To style a specific field individually, click on the field directly and edit from there.
- Custom CSS: Add your own CSS for advanced styling if you need more control beyond the built-in options.
- Button Style: Modify the appearance of buttons, including their color, size, shape, and font.
If you'd like a more detailed breakdown of these styling options, check out the Styling Forms and Surveys workflow.

Step 10
Finally, let’s move to the Other tab.
This section includes additional features and actions that help fine-tune how your form or survey behaves and appears. Below is a quick overview of each folder:
- Show Survey Name: Choose whether the survey name appears at the top of the form.
- Action on Submission: Define what happens when someone successfully completes the survey.
- Action on Disqualify Immediately: Set an action to run the moment a disqualifying condition is met.
- Action on Disqualify on Submission: Trigger an action after submission if a disqualifying condition applies.
- Facebook Tracking Pixel: Add a Facebook pixel ID for tracking survey or form submissions.
- Additional Form Field Options: Enable Display one question at a time and Remember contact.
- Progress Bar: Add a visual indicator to show users how far along they are in the form or survey.
- Header: Insert content (text, or image) that appears at the top of your form or survey.
- Footer: Insert content that appears at the bottom of your form or survey.
If you’d like a more detailed breakdown of the available actions and advanced settings, check out the Other Advanced Settings and Actions workflow.

Step 11
When you are done editing your survey, click the blue Save button on the top right of the page to save your edits.

Step 12
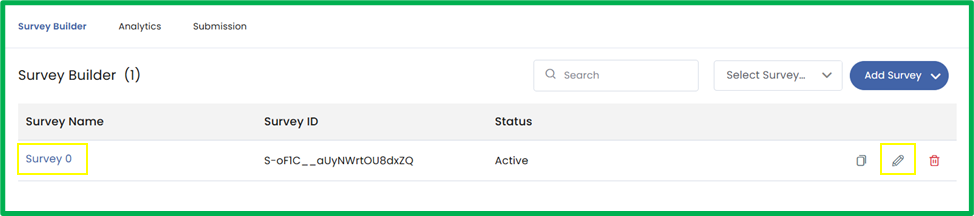
Once the survey is saved, it will appear in the Survey Builder tab under the Forms & Surveys module.

Step 13
To edit your survey, click on either the survey name on the left or the Pencil icon located on the right.
Step 14
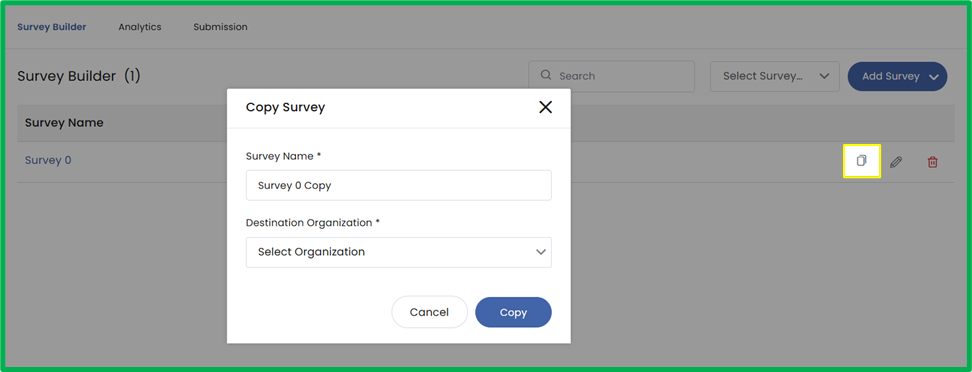
You can make a copy of the survey using the copy icon on the right. Once the Copy Form page materializes, click the Destination Organization dropdown and select the organization you want to copy the survey to. You can copy the survey to the current account or to another account.
Step 15
To delete the survey, click the red Trash Bin on the right of the survey screen.

Step 16
Once you click the Trash Bin, a Confirmation popup will appear. Enter the word “Delete” in the text box and press Submit. This action cannot be reverted, the deletion is permanent.
